Now, open up your model in 3DS Max (you'll need to be using 32-bit in order to make use of the .xsi exporter). In this example, I will use the AAN Sabre Tank model and animate the antenna to sway around in the wind realistically and easily, using multiple bones AND an IK Solver.
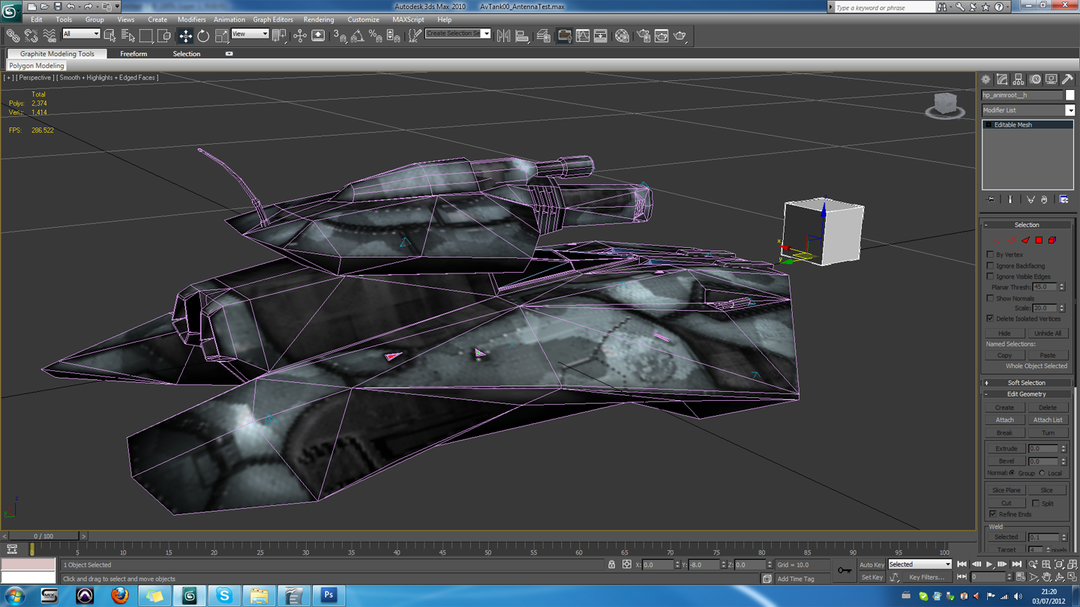
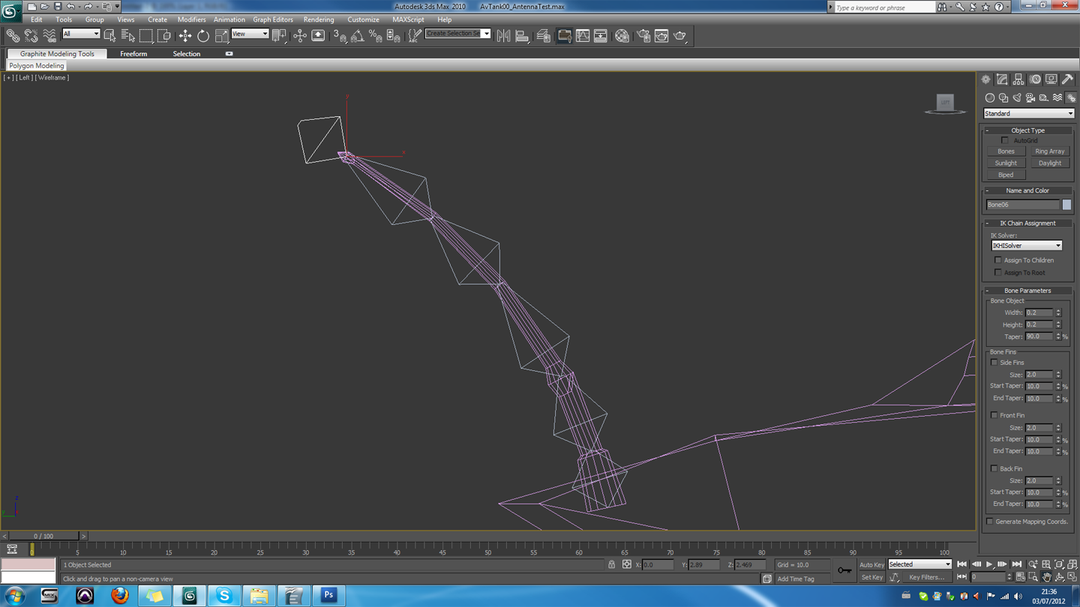
This is how the antenna looks in Max. As you can see the Antenna is a single object, and is made up of a series of segments to give it a curved overall shape. Because of this, we'll need to use multiple bones to animate it realistically, as using too few bones will deform the shape of the antenna as it sways, or cause it to pivot around a single point, which isn't what we want. You can also see on the right hand side that the antenna currently has a long list of modifiers, to avoid confusion and complications down the line, collapse any stacks down and ensure that all parts of the model are only left as 'Editable Meshes'. If you think you're going to need to make changes later, save to a new file name.

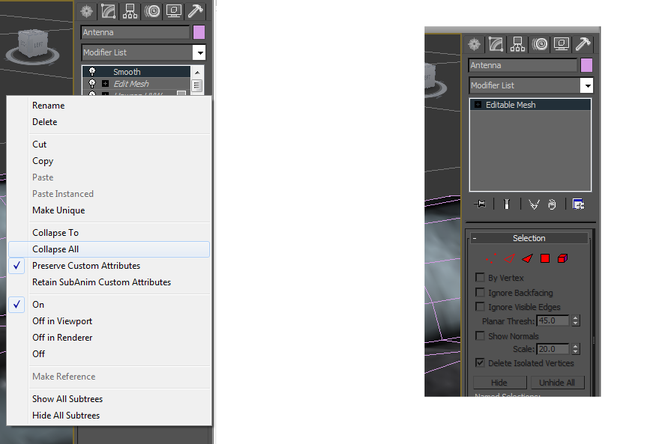
Now we'll need to set up the animation root and the bones. To do so, simply create a cube primitive and set it's size to 1.0 for L, W and H (or whatever seems appropriate for the model you're using, you'll ideally want to hide it inside the geometry). Rename the cube to hp_animroot__h. Now add an edit mesh modifier, and collapse the stack, you should see something like the image below.
This object will serve as the root object for all of your bone animations. Move it to the centre of the model (the origin in this example), and go to the hierarchy editor. If you don't have one already, create a hp_dummyroot object, and set that as the master parent object (shown below). It's good practice to use a dummyroot object as the origin for the other parts of the mesh anyway.
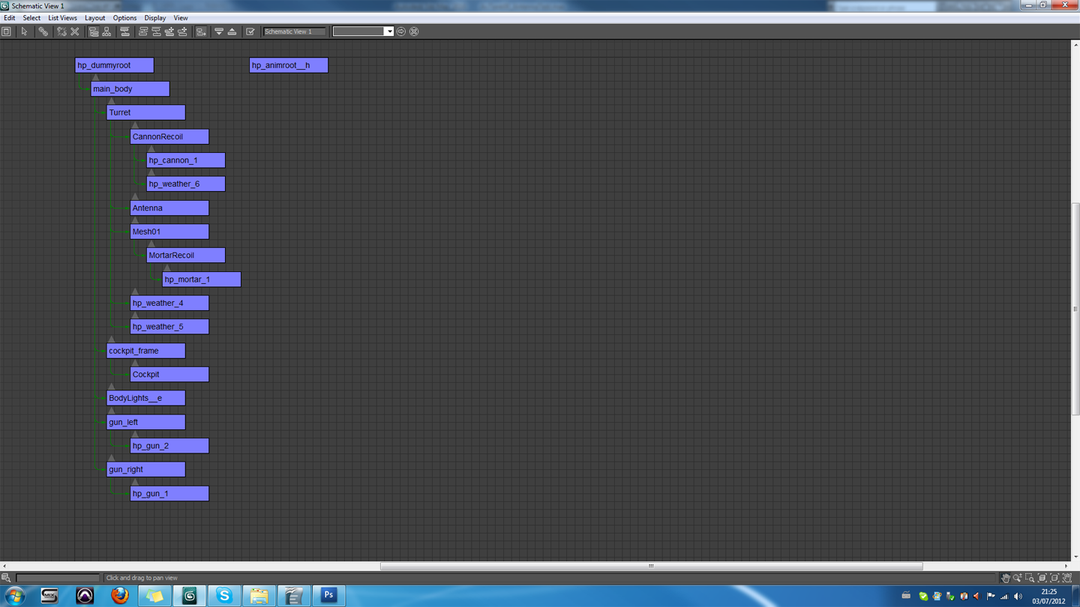
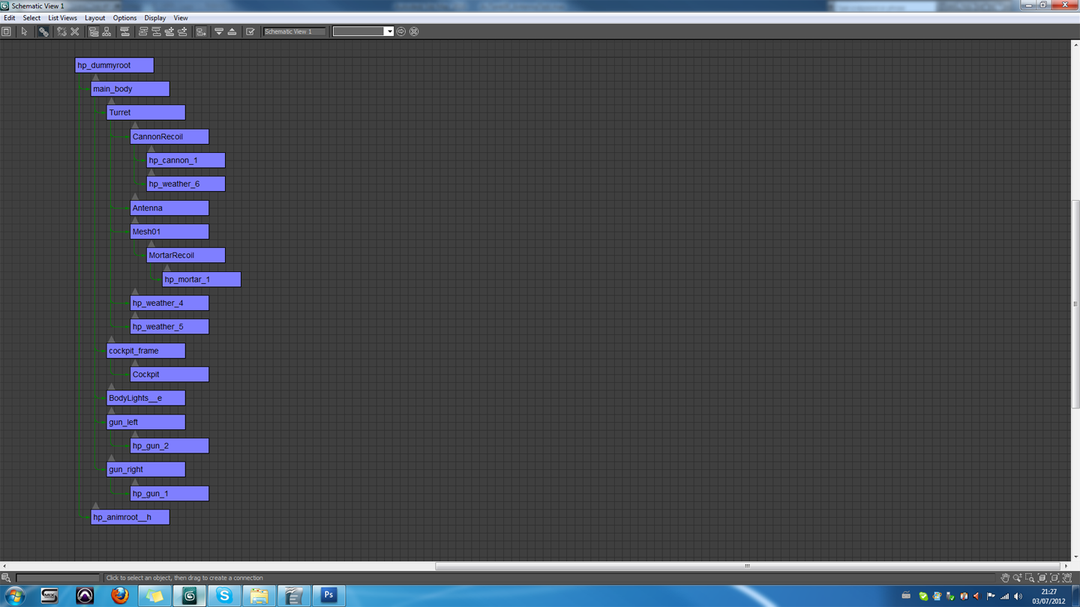
Now make the hp_animroot__h object a child of the hp_dummyroot object.
Now we need to set up the bones. Before doing so, you'll want to make sure that ALL of your animation controllers will be set to TCB. This is easy enough, simple select the HP_animroot__h object, and navigate to the 'Motion' panel. Under the 'assign controller' sub-window, expand the transform controller, click on the Position controller, and click the assign controller button (the small square with a tick above the controller list). Change this to 'TCB Position', and do the same thing for Rotation and Scale. Each time you do this, press the 'Make Default' button in the assign controller dialogue box, then hit OK for each one.
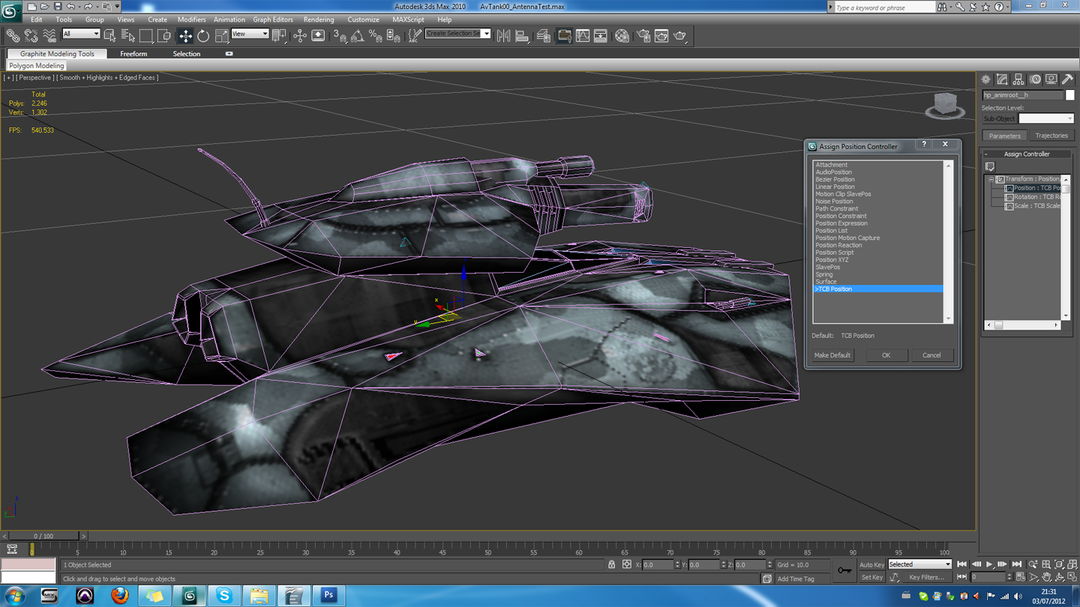
Now every time you create a new object, it's animation controllers will default to TCB, which is the only one BZ2 supports.
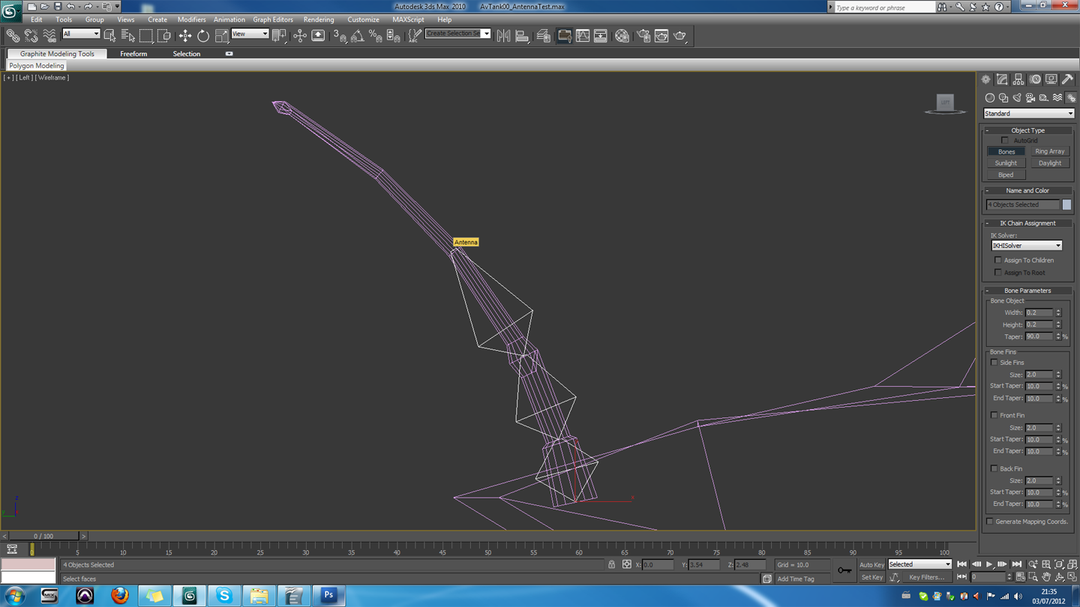
Go back to the create panel, and navigate to 'systems' (the cogs on the far right in 3DS Max 2010). Then click on 'Bones'. You can now navigate to a good location, and draw the bones from start to finish by clicking and dragging. Once you reach the end of the structure, hit the ESC key to add the end bone. In the images below, I'm using the side view to accurately line up the bones with the antenna's segments. You'll have to figure out what works best for your model.
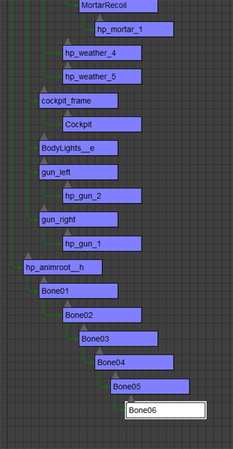
Because you clicked and dragged, the hierarchy for these bones is already set up for us, but we need to make the bone structure a child of the animroot object we created earlier. Do that now in the hierarchy editor.
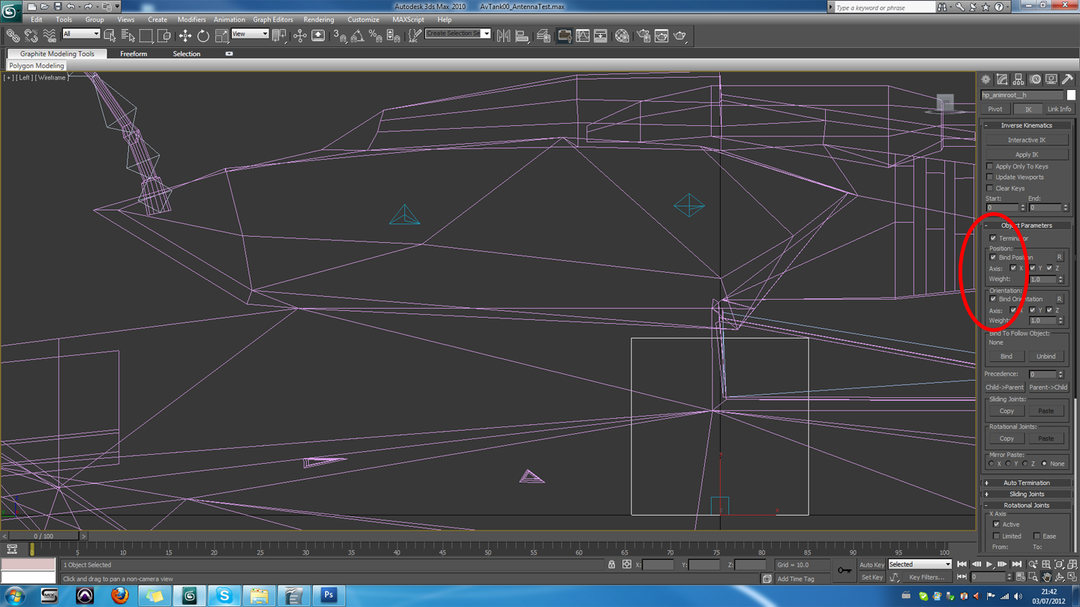
Now we'll need to set the parameters up. Navigate to the hierarchy panel, and to the IK page. Select each bone individually, and check the 'Bind Orientation' and 'Bind Position' check boxes. For any bone that is NOT going to move, also check the 'Terminator' box. This includes the animroot object.
Now that this is done, we can actually animate. You can choose to animate the bones individually, which will work for some methods and not others. For this example though, we want to use an IK solver. Select the end bone of the structure, then go to Animation > IK Solvers > HI IK Solver, and drag to the second bone in the chain. You can drag to any bone and form a chain, but we want to link to this one in this example. Click on the bone to create the chain.
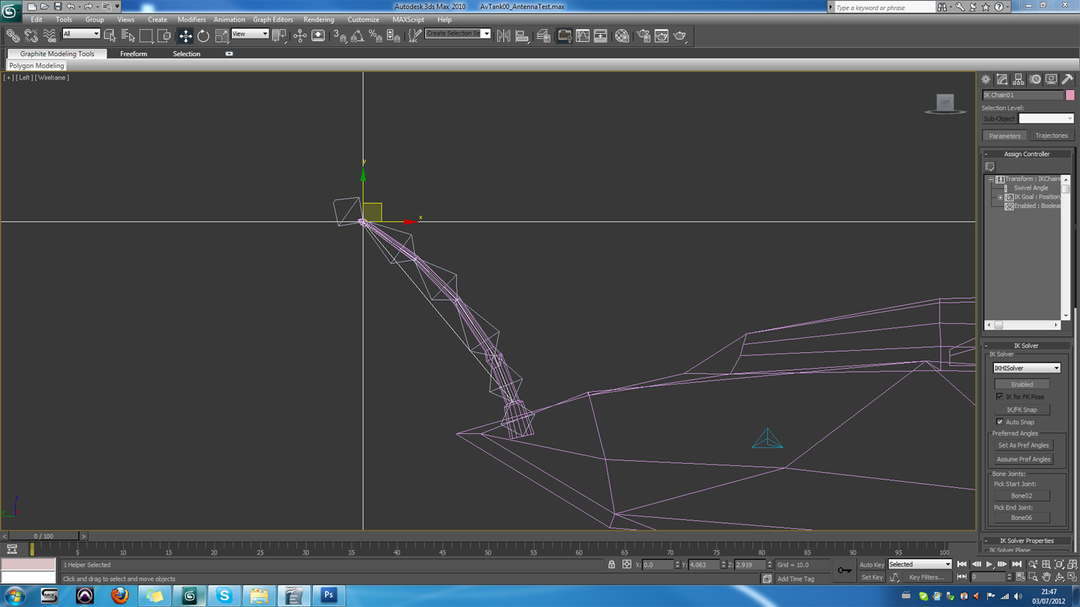
You can now move the IK chain, and the bones will move in relation to it. Remember that we haven't skinned the antenna yet, so make sure you undo any movement to put it back to the original position.
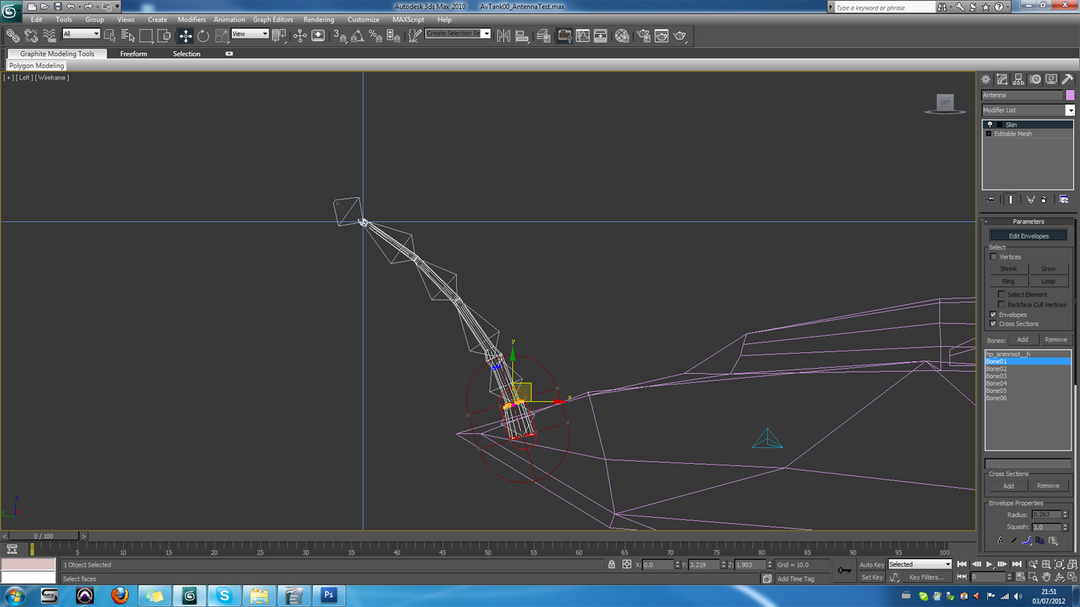
Select the antenna and add a 'Skin' modifier. Click to Add bones, and add the hp_animroot__h object first. Then repeat this process and add all of the bones. It's important that you add the animroot object first. You may need to edit the envelopes to ensure that the bones only effect the vertices you want them too. The hotter the colour of the vertex, the more affected it will be by the bones movement.
Now that you've rigged the antenna, you can drag the IK solver object, and watch your object deform, flex and bend as you do so. Key in your animations by moving the IK solver as per the usual method.
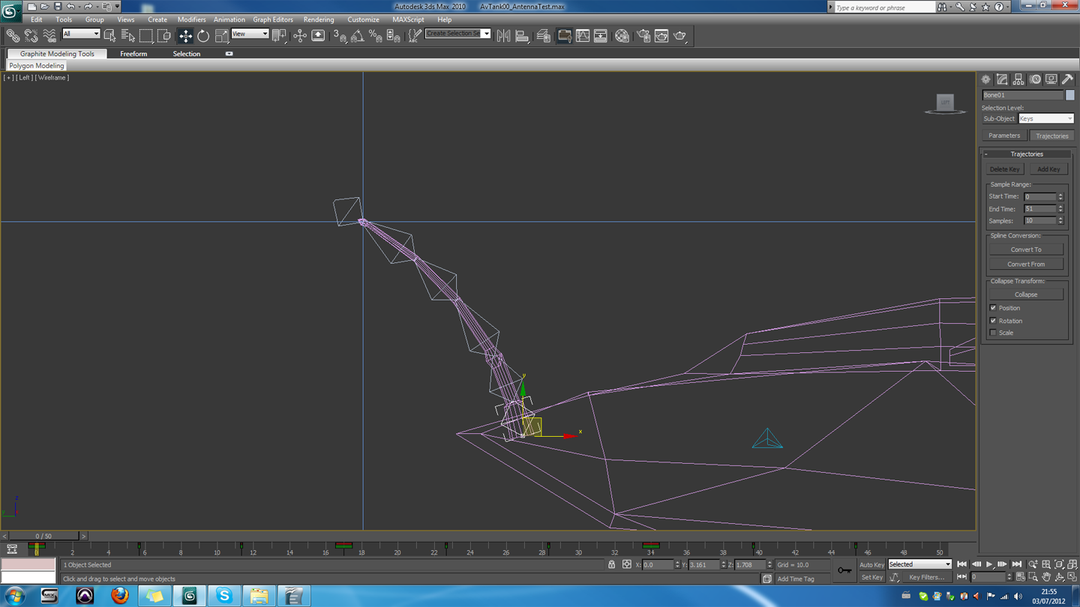
BZ2 doesn't support IK Objects, so we'll need to 'bake' this animation into the bones themselves, and BZ2 will move those. This is relatively simple. Select the first bone, and navigate to the 'Motion' panel again. This time, click on 'Trajectories'. Set the start and end time to match the length of your animation, and hit 'Collapse'. You bone should now be automatically key-framed according to the IK solvers animation. Repeat this step for all affected bones.
You can now safely delete the IK Solver object, and you animation will remain there in the bones themselves! Test the animation by hitting the 'Play' button. It should also be smoother once the IK solver has been deleted.
Now we can export this animation to use in BZ2. Export the model as an XSI, and be sure to check the 'animation' box, which will export the animation data into the .XSI. Now you'll need to export the 'Envelope' data to that .xsi also, in order for it to work.
Go to MAXScript > Run Script, and select Nielk1's envelope exporter script. You'll now be prompted to select the file you just exported. Do so, and press 'Open'.
That’s it! Now test your vertex animation in-game!
Pro Tip: To ensure the bones are invisible in-game, add the __h suffix to each ones name!